The Gitrog Monster Lite Guide

Guide Sections
Cards Mentioned in This Review
These cards are referenced in the strategy guide below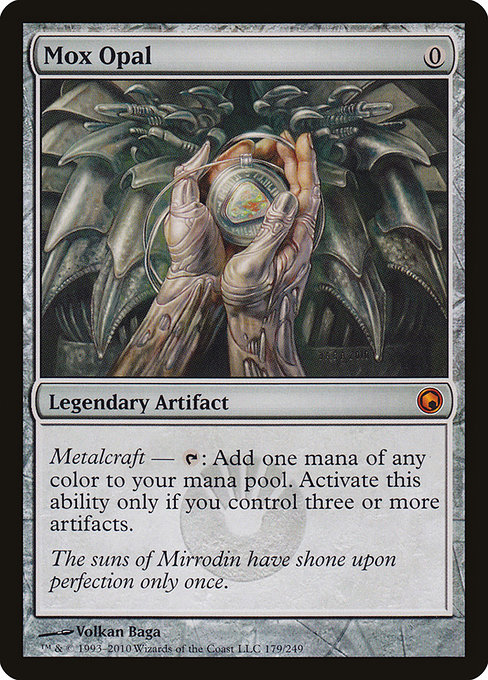
Strategy Guide
Last updated 2025-06-30TL;DR Summary
TL;DR Summary: The Gitrog Monster
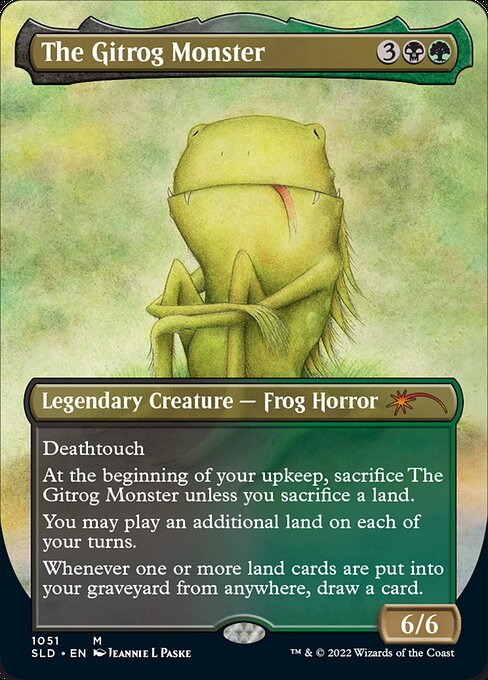
The Gitrog Monster is a powerful, mythic-rarity creature that excels in Commander decks. Its key benefits include:
- Deathtouch: Deals 3 damage to any tapped creature when attacking.
- Land ramp: Allows an additional land on each turn, enabling faster mana acceleration and more aggressive gameplay.
- Card draw: Draws a card whenever one or more lands enter the graveyard from anywhere, providing consistent card advantage.
The Gitrog Monster is particularly effective in combo-heavy decks that exploit its land-dumping ability. It pairs well with Rampant Growth, Llanowar Elves, and other ramp spells to accelerate mana development. Its large size (6/6) also makes it a formidable attacker, capable of dealing significant damage to opponents.
When building around the Gitrog Monster, consider including:
- Land-heavy combo pieces
- Card draw engines like Brainstorm or Ponder
- Creatures with deathtouch or trample
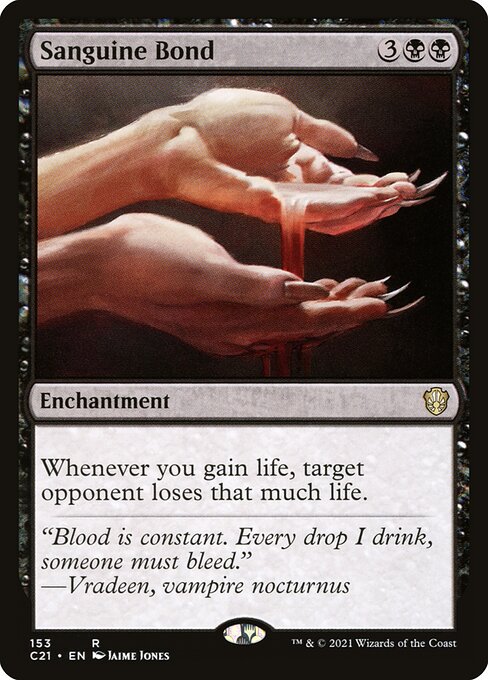
Keep in mind that its sacrifice requirement can be challenging to maintain, especially in games where you're not drawing a land on your turn. To mitigate this risk, include cards that help manage the Gitrog Monster's life total, such as Sanguine Bond or Weldring Beetle.
Card Mechanics & Interactions
The Gitrog Monster is a formidable Legendary Creature that warrants careful consideration in Commander decks. Let's break down its rules and abilities:
Deathtouch: The Gitrog Monster has Deathtouch, which means any opponent who attacks with it will destroy the attacking creature, regardless of its power or toughness.
Sacrifice Condition: At the beginning of your upkeep, sacrifice The Gitrog Monster unless you sacrifice a land. This creates an interesting dynamic: if you don't have a land to sacrifice, The Gitrog Monster dies, which might not be desirable given its value. However, this also means that sacrificing a land is a viable option every turn.
Additional Lands: You may play an additional land on each of your turns. This ability allows for accelerated land development and potentially explosive gameplay with cards like Sylvan Caryatid or Fertile Ground. Be cautious not to overextend, as this can lead to mana flooding issues.
Triggered Ability: Whenever one or more land cards are put into your graveyard from anywhere, draw a card. This ability is extremely powerful in combination with removal spells that exile lands, such as Necrotic Ooze or Graul's Champion. It also synergizes well with cards like Bloom Druid.
Notable Edge Cases:
- If you sacrifice The Gitrog Monster to itself (e.g., via Slaughter Pact) and then return it to the battlefield, its Deathtouch ability will still be active.
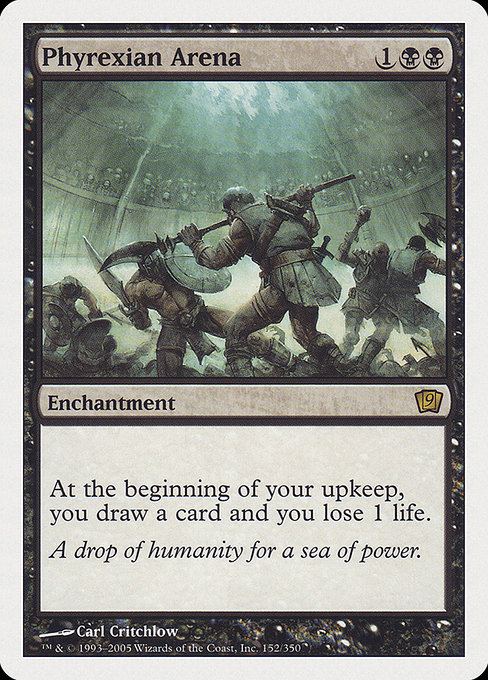
- If you exile a land with a card like Phyrexian Arena, you'll draw a card due to The Gitrog Monster's triggered ability.
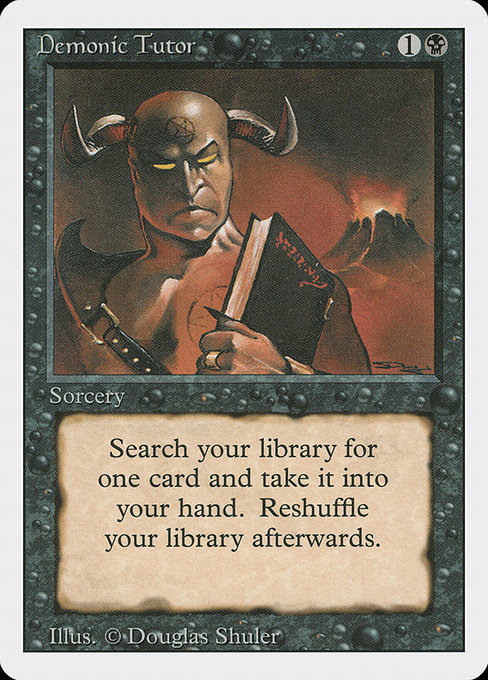
When building around The Gitrog Monster, consider including cards that accelerate your mana development, provide additional lands, or enable the exiling of lands. Cards like Demonic Tutor or Ad Nihilum can help find and cast The Gitrog Monster more efficiently. Be mindful of the potential for mana flooding when taking advantage of its additional land play ability.
The Gitrog Monster is a powerful creature that rewards careful deck-building and strategic play. Its interplay with other cards, especially those that interact with lands or removal spells, can lead to explosive combinations and game-changing draws.
Strategic Applications
The Gitrog Monster is a powerful and versatile creature that can be a game-changer in various Commander decks. Its ability to generate card advantage through its triggered ability makes it an attractive addition to many strategies.
Common Archetypes
- Land Destruction: The Gitrog Monster's deathtouch ability makes it a great fit for decks focused on destroying opponents' lands, such as Baneslayer Angel-based lists.
- Token Generation: Its ability to draw a card when lands enter the graveyard synergizes well with token-generating cards like Kurkesh, Onakke Ancient, creating a self-sustaining cycle of card advantage.
- Combo and Mill: The Gitrog Monster's land sac ability allows it to be sacrificed for value, making it a great fit for combo decks that rely on mill or graveyard interactions.
Role on the Battlefield
- Beats: With its 6/6 power/toughness, The Gitrog Monster is an excellent beatstick that can trade with larger creatures while also generating card advantage.
- Board Presence: Its ability to be sacced for value and draw a card makes it a great way to disrupt opponents' plans and maintain board presence.
Decks or Strategies That Benefit Most
- Green-Black Aggro: Decks focused on aggressive, low-toughness creatures like Scourge Wolf can greatly benefit from The Gitrog Monster's ability to generate card advantage.
- Token-Based Combo: Lists that rely heavily on token generation and sacrifice effects, such as Jeska, Thirst for Knowledge, can find value in the Gitrog Monster's ability to draw cards.
- Mill and Combo: Decks focused on mill or graveyard interactions, like Kurkesh, Onakke Ancient-based lists, can use The Gitrog Monster to generate card advantage and fuel their combo.
The Gitrog Monster is a valuable addition to many Commander decks, offering a unique combination of combat presence and card advantage generation. Its versatility makes it a popular choice for various strategies, from aggro to combo and mill.
Advanced Techniques
The Gitrog Monster is a versatile and powerful creature that can fit into various black-green decks. Its deathtouch ability makes it an excellent removal spell in combination with Golgari Findbroker or Mwonvuli Acid-Moss. However, its true strength lies in its ability to sacrifice lands for card draw.
Sacrificing Lands for Card Draw
The Gitrog Monster's ability to draw a card whenever one or more land cards are put into the graveyard from anywhere can be leveraged in several ways:
- Land Dumping: Pair The Gitrog Monster with Golgari Rotwheeler or Korlash, Truth-Rotter to create a land-dumping strategy. Sacrifice lands to draw additional cards and play more spells.
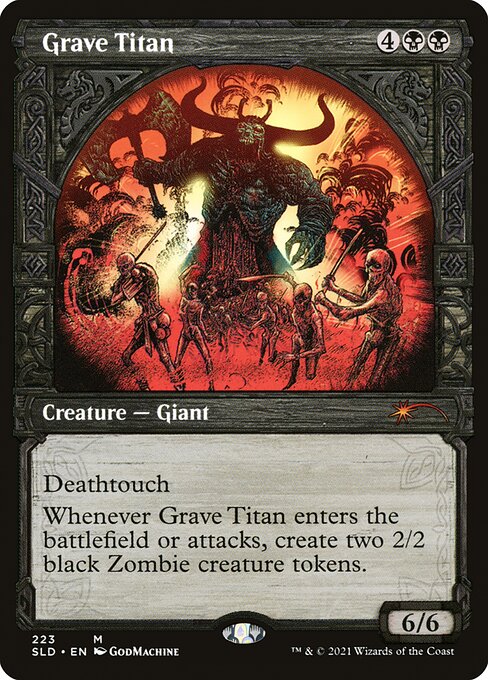
- Self-Mill: Use Grave Titan or Eternity Snare to mill lands into the graveyard, triggering The Gitrog Monster's ability multiple times.
Synergies with Other Cards
The Gitrog Monster has several synergistic relationships with other cards:
- Golgari Findbroker: Sacrifice a land with Golgari Findbroker in play to draw two cards and generate card advantage.
- Mwonvuli Acid-Moss: Combine The Gitrog Monster with Mwonvuli Acid-Moss to sacrifice lands for card draw while also generating additional mana.
- Grave Titan: Use Grave Titan's ability to mill lands into the graveyard, triggering The Gitrog Monster's ability multiple times.
Additional Uses
Beyond its deathtouch and land-sacrificing abilities, The Gitrog Monster has other uses:
- Combo Pieces: Use The Gitrog Monster as a combo piece with Eternity Snare or Grave Titan to create complex interactions.
- Midgame Beaters: Deploy The Gitrog Monster in the midgame as a 6/6 deathtoucher, using its ability to draw cards and play additional spells.
The Gitrog Monster is a powerful and versatile creature that can be used in various black-green decks. Its synergies with other cards create opportunities for complex interactions and card advantage.
Common Mistakes
The Gitrog Monster is a formidable creature in Commander decks, but it's often mismanaged due to its unique abilities. Here are some common mistakes players make:
- Misunderstanding the sacrifice condition: Some players think that The Gitrog Monster can be sacrificed at any time, but its Oracle Text states "at the beginning of your upkeep." This means it must be sacrificed during your upkeep phase on each turn unless a land is also sacrificed. If this isn't done correctly, the creature will die and cannot be revived.
- Ignoring the land advantage: The Gitrog Monster's ability to play an additional land on each of its controller's turns is often overlooked. This can lead to unnecessary waste or inefficient land management. Consider pairing it with lands that generate card advantage, such as Llanowar Elves or Fool's Bane, to maximize the value of this ability.
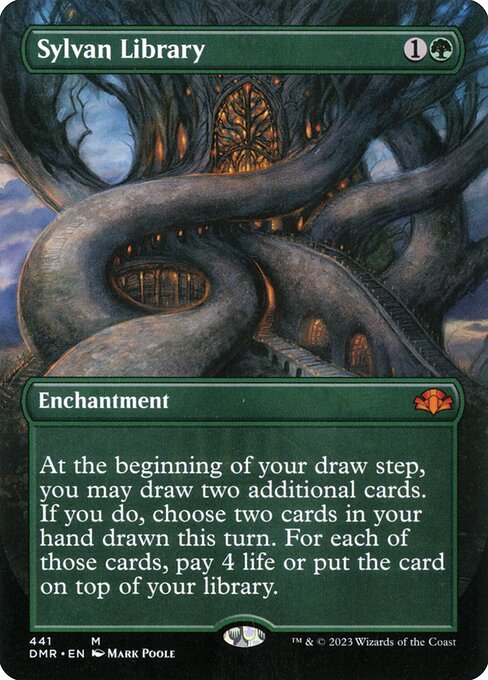
- Underestimating the graveyard synergy: The Gitrog Monster draws a card whenever one or more land cards are put into its controller's graveyard. This can be particularly powerful when combined with cards like Sylvan Library or Mox Opal, which generate card advantage from the graveyard.
- Not considering alternative ramp spells: While The Gitrog Monster's additional land ability is convenient, it may not always be the most efficient way to ramp up your mana. Consider using more flexible ramp spells like Simian Spirit Guide or Savannah Paradise instead.
Common pairings to avoid:
- Pairing with too many sac lands: While The Gitrog Monster's sacrifice condition can be mitigated by playing a land each turn, overloading the deck with sac lands can lead to an unsustainable draw engine.
- Ignoring card advantage trades: The Gitrog Monster's graveyard synergy relies on generating card advantage from its controller's graveyard. Be cautious when pairing it with cards that generate card advantage at the expense of creatures or other valuable resources.
Keep in mind that Commander is a format where deck-building and strategy can be highly nuanced. Carefully consider how The Gitrog Monster interacts with your overall deck architecture to avoid these common mistakes.
Conclusion
The Gitrog Monster is a formidable addition to any Commander deck, offering a unique combination of deathtouch, ramp potential, and graveyard manipulation. Its ability to sacrifice itself or other lands to gain card advantage makes it a valuable component in any strategy that prioritizes tempo and flexibility.
In particular, The Gitrog Monster excels in decks that focus on big creatures and sacrifice synergy, such as Golgari Grave-Trove or Bolas's Citadel. Its ability to draw cards when lands enter the graveyard is particularly potent in these contexts, allowing players to efficiently fuel their combos and ramp into more powerful spells.
One of the key considerations for including The Gitrog Monster in a Commander deck is its high mana cost. At 5 colorless, it can be challenging to cast on turn three without sacrificing other lands or creatures. However, its potential payoff makes it worth considering in decks that prioritize ramping up quickly and leveraging life loss.
In terms of specific use cases, The Gitrog Monster pairs particularly well with Death's Shadow, allowing players to generate card advantage while also pressuring the opponent with a powerful creature. It can also be used as a threat in itself, using its deathtouch to remove opposing creatures and clear the way for more aggressive plays.
In terms of overall value, The Gitrog Monster is an expensive but highly valuable addition to any Commander deck that incorporates big creatures and sacrifice synergy. Its potential to generate card advantage and ramp up quickly makes it a worthwhile investment in decks that can effectively utilize its abilities.